

Installing a Custom Cover:
Step 1
Inspect the area 3' back from the water's edge around the entire pool. Remove any irregular obstructions that may protrude through the cover. Pad rough coping, sharp edges and inside corners with carpet, foam or similar material. Excessive wear due to non padded areas is specifically excluded from the warranty.
Step 2
Measure exact dimensions of swimming pool and cover. From the difference between these measurements, adjust the overlap so that it is equal at all corners of the pool. Though standard overlaps on stock covers are 12" and custom covers 15"-18", they may vary several inches either way.
Step 3
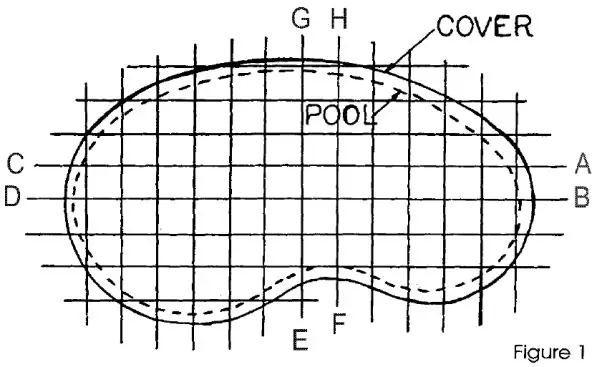
Locate anchor positions on Figure 1. Begin with strap location [A] and measure 20" from cover. Mark this location on the deck. Continue for straps [B], [C] & [D] .
Step 4
Install the anchors for [A],[B], [C] & [D] (See Anchor Installation) and attach flat shaped side of springs to corner straps (see spring attached to cover for proper spring attachment). Next, install the springs on the anchors using the Installation Rod (see Cover Installation). Adjust buckles so that springs will compress 60%-70% for a taut fit.
Step 5
Continue with installing straps and anchors [E], [F], [G] & [H] as indicated in Figure 1
Step 6
After completing the initial installation of the first 8 anchor, install the remaining anchors working from the center of the cover to the ends. Remember to alternate sides and to attach and secure each spring to the cover as each anchor is installed.
No items are available in this category at the moment. Try browsing other sections in the menu or use the search.
Related Products
Last Updated: 02/26/2026 04:40 AM - ID:2961